Introduction
The client details screen gives you access to all the information and actions related to a given lead or client. You can view and edit your follow up date, groups, notes, and interaction timeline, contact the client, add to your phonebook, and edit or delete the client from here.
Client Details
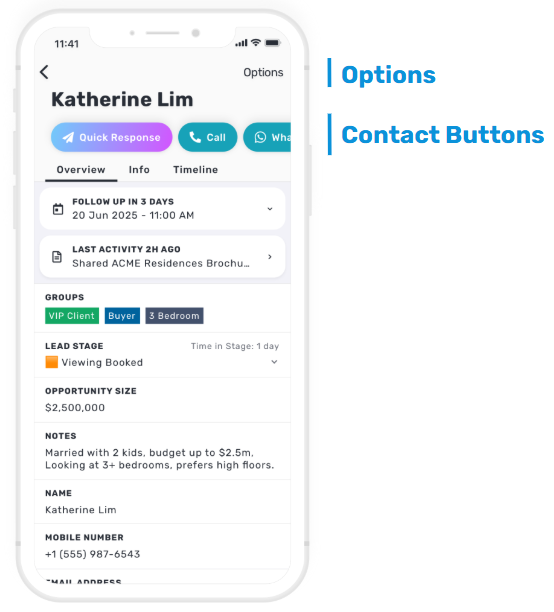
The client’s name is displayed at the top of the screen, with buttons to send Quick Response, Call, SMS, email, or WhatsApp the client. These contact buttons will be greyed out if the relevant information is missing (e.g. no phone number or email address).
The QUICK RESPONSES button at the top allows you to send an auto-personalised message, file, or page to the client in seconds, without even needing to type. Just tap this button and select the content you wish to send. View more about Quick Responses.
Tap on the Options button in the top right to edit the client, delete the client from Privyr, mark the client as an uncontacted lead, add the client to your phonebook, or share client details.
Overview
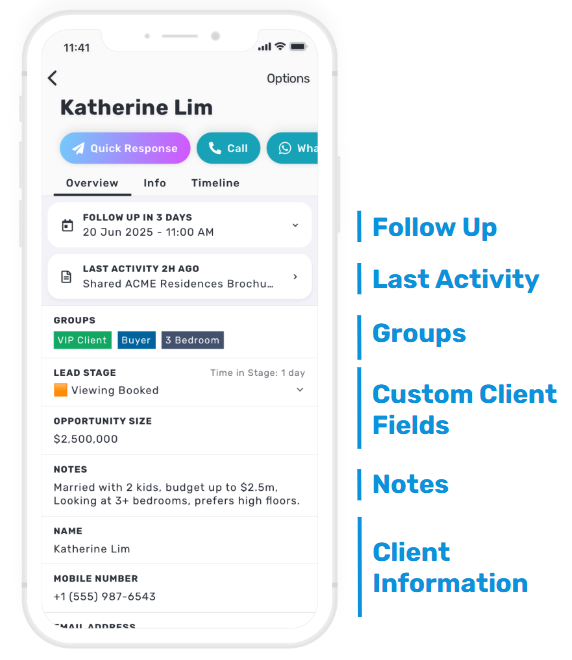
The Overview tab shows the Follow Up, Last Activity, Groups, Custom Client Fields and Notes of the Client Detail.
- The Follow Up field shows the next follow up date for the client. You’ll receive follow-up alerts via the Privyr app on the date and time that a client’s follow up is due. Tap anywhere on this field to change the follow up date and/or time.
- The Last Activity field shows the last activity performed for the client.
- The Groups section shows all custom groups that the client is a part of. Tap anywhere on this section to add or remove the client from groups. This section will be hidden if you haven’t created any groups yet.
- The Custom Client Fields section shows the details of your client that you’ve added as a Custom Field. This section will be hidden if you haven’t created any Custom Client Fields.
- The Notes field shows any notes you’ve added about the client. A preview of these notes will also be shown on your client list for your reference. Tap anywhere on this field to add or edit your notes.
Info
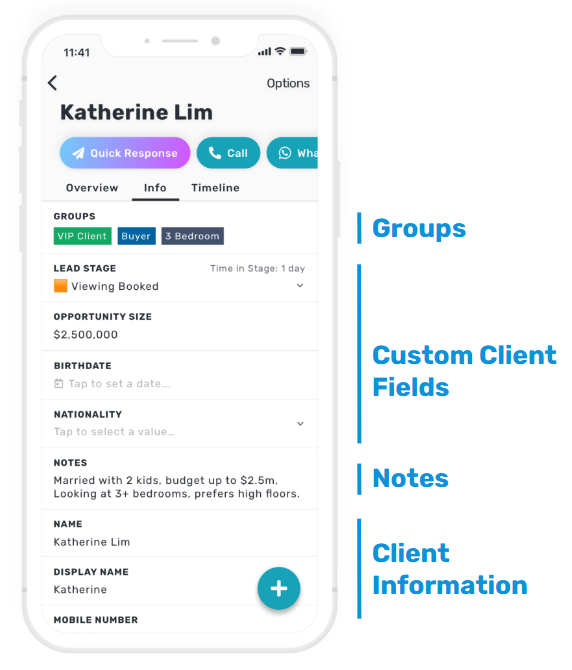
The Info tab shows the Client Information, such as their Name, Contact Details, Date created, Groups, Notes, and your created Custom Client Fields.
- The Groups section shows all custom groups that the client is a part of. Tap anywhere on this section to add or remove the client from groups. This section will be hidden if you haven’t created any groups yet.
- The Custom Client Fields section shows the details of your client that you’ve added as a Custom Field. This section will be hidden if you haven’t created any Custom Client Fields.
- The Notes field shows any notes you’ve added about the client. A preview of these notes will also be shown on your client list for your reference. Tap anywhere on this field to add or edit your notes.
- The Client Information shows the basic contact information of your client, such as their Name, Display Name, Mobile and WhatsApp Number, their Email Address and the date they were added or created to your Client List.
Timeline
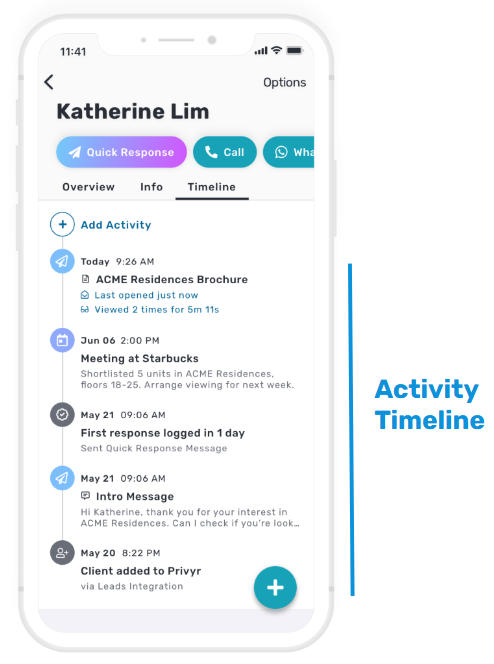
The Timeline tab shows a complete history of interactions with the lead or client, including activities (e.g. phone calls, messages, meetings, and notes) as well as content that you’ve sent the client through Privyr (e.g. messages, files, and pages).
All timeline interactions are sorted chronologically by date and time, with the latest items at the top. Any files and pages shared with the client will also display statistics such as if and when the client last viewed it, the number of times viewed, and the total time spent viewing. Tap the file or page to show detailed view stats.
You can add interactions to your timeline, or tap on an existing item to view more details and options related to it.
Detailed File & Page View Stats
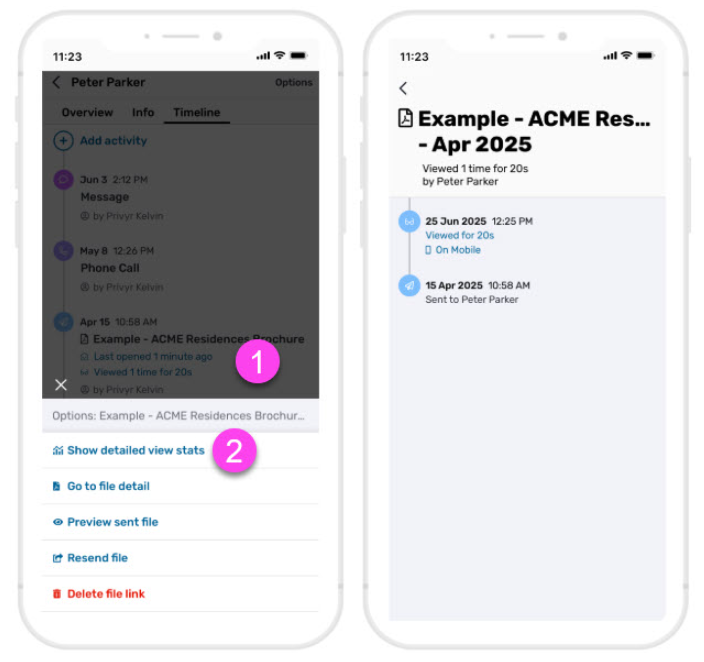
If you’ve shared Files and Pages with a client, you can see detailed view stats showing a breakdown of all views on the content you’ve sent, including the date and time of each view, the time spent viewing, and even what type of device it was viewed on.
Simply tap the shared file or page from the client timeline, then select ‘Show detailed view stats’.
Adding and Editing Timeline Interactions
MANUALLY ADDING ACTIVITIES
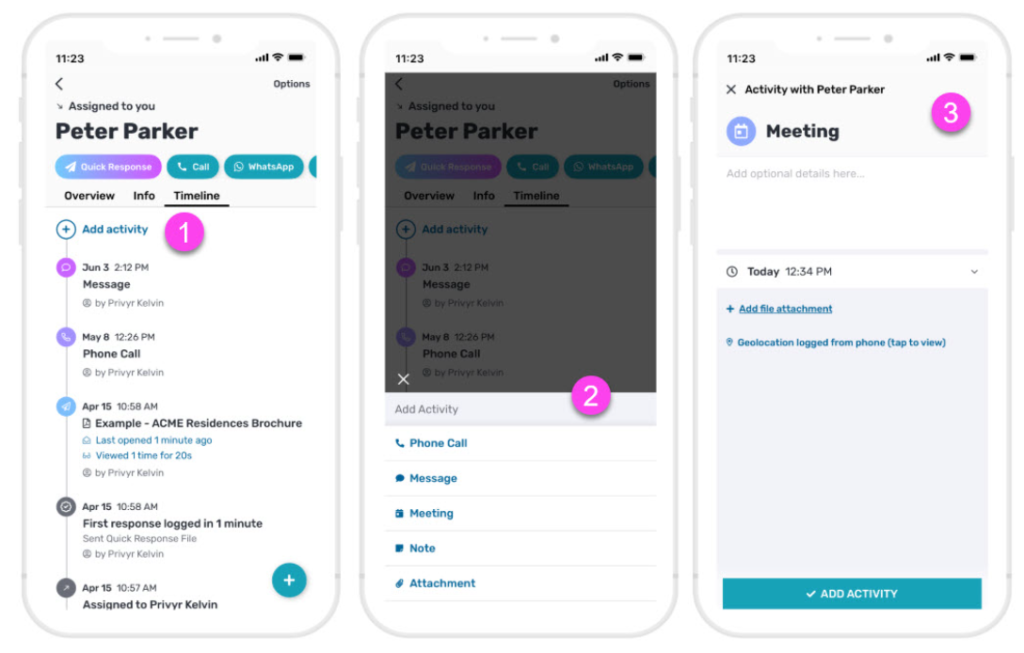
Tap the ‘+ Add Activity‘ button to manually create activities on your timeline. You’ll be prompted to select an activity type (Phone Call, Message, Meeting, Note, or Attachment), and can view and edit the following fields of the activity:
- Title is the name of the activity. It will default to the activity type (e.g. Phone Call, Message, Meeting, or Note), but you can customise the title by tapping to edit it.
- Icon is a visual representation of the activity type. You can tap it to change the icon or activity type.
- Details are optional comments about the activity. You can add as much information here as you like, or just leave it blank.
- Date & Time will determine where the activity will be displayed in the timeline. It will default to the current time, but you can tap to change it to any time in the past or future.
- Attachments allow you to attach images, videos, audio files, PDFs, and more to your activities
- Geolocation allows you to view the location you were at when this activity was created
Once you’re done, tap the ‘ADD ACTIVITY‘ button at the bottom to save it to your timeline.
For upcoming activities, you can set up alerts to receive push notifications at the time of activity, 15 minutes before activity, and/or 1 hour before activity. You can change this setting by going to your Account tab and clicking on Settings > Notifications > Upcoming Activity Alerts.
AUTOMATICALLY CAPTURED ACTIVITIES

Activities are automatically logged to your client’s timeline whenever you click the contact buttons to call, SMS, email, or WhatsApp a client. Upon returning to Privyr, you’ll be prompted with the option to update or discard the activity.
You can tap to add quick notes about your call or message directly from this prompt, and save the updates via the ‘LOG ACTIVITY’ button. For bigger changes, tap the ‘Edit’ button in the upper-right to switch to the full editing view and update the title, icon, details, and/or date & time.
If you tapped the contact button by accident or don’t want to save the activity to your timeline, just select ‘DISCARD’ when prompted.
Note that any content you send the client through Privyr, such as messages, files, and pages, will also automatically appear in your client’s timeline.
EDITING AND DELETING FROM THE TIMELINE
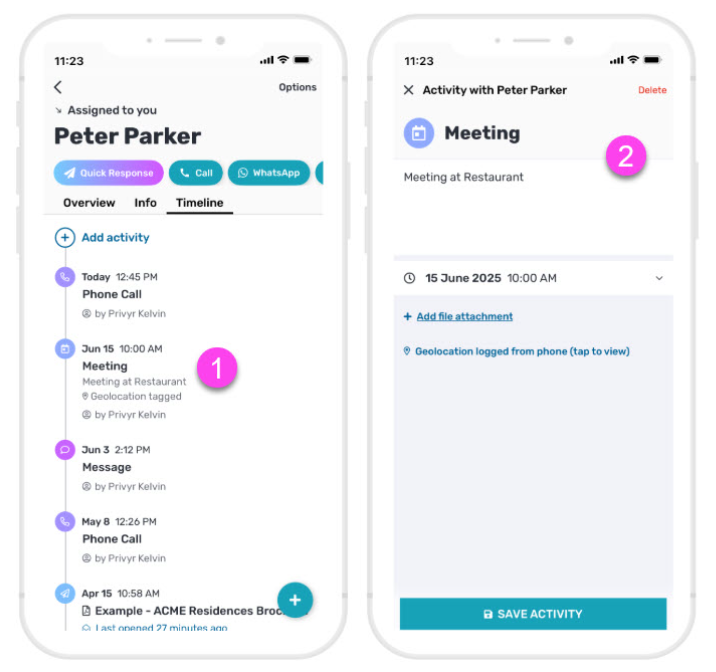
Tap on any timeline item to show options to view, edit, or delete it. Note that the options available will depend on the type of item selected:
- Activities (phone calls, messages, meetings, and notes) are fully editable, and can be deleted.
- Content (messages, files, pages) cannot be edited, as they reflect what was sent to the client. Instead, you’ll have options to view the content details, preview what was sent, resend the content, or delete it. Note that deleting a file or page from a client’s timeline will also make the file or page link you shared with them invalid, so they’ll no longer be able to access it.
Uncontacted Leads
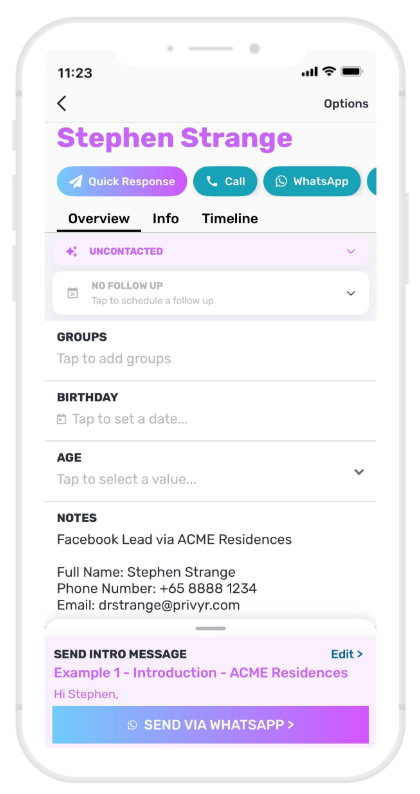
New Leads received via integrations such as your website or Facebook Lead Ads will be highlighted with a purple UNCONTACTED bar when viewing their client details. They are also displayed with a UNCONTACTED label next to their name on your client list, and will appear in your Uncontacted Leads group.
You can tap on the purple UNCONTACTED bar to save the contact to your phonebook or remove the Uncontacted label. All other information and functionality is the same as the Client Details screen.
You can set a Default Intro Sequence which will prompt you to start engaging the lead with a pre-defined sequence, whenver you view an uncontacted lead in the Privyr app.
Depending on your Uncontacted Lead Settings, the UNCONTACTED label may be automatically removed when you click their contact buttons, send them a quick response, and/or add a manual timeline acttivity. You can also manually mark or unmark an uncontacted lead via the Options menu.
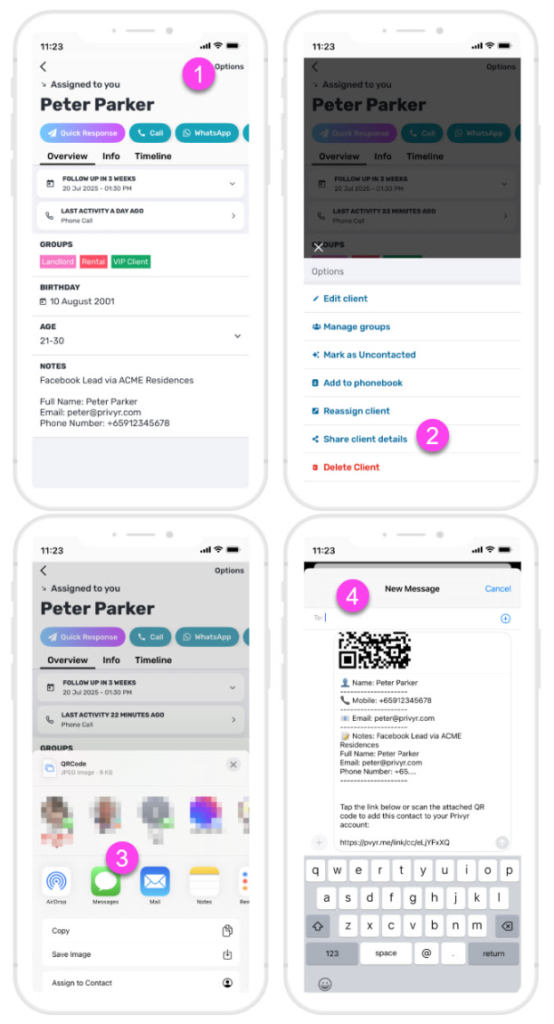
Share Client Details with Others
You can easily share basic lead details with others, whether they are Privyr users or not, by following these steps:
- Go to the client that you want to share and tap on Options
- Select Share client details
- Select the app that you want to send the client details to (e.g. Messages, WhatsApp, Email, Telegram, Instagram, Messenger, etc.)
- Your selected app will be populated with the following:
- Basic client details: The client’s name, mobile number, email address, and notes. If the notes are too lengthy, they will be truncated. Full notes can be accessed by adding the client to Privyr via the provided link or QR code.
- Link: Tapping the link will automatically add the client to Privyr, if the recipient has the app installed.
- QR code: Scanning this QR code will also automatically add the client to Privyr, if the recipient has the app installed.
To find out how to automatically share leads received from integrations with others, view our Automatic Lead Distribution guide.