Introduction
Privyr has built-in follow-up reminders for every client, making it easy to keep your relationships warm and prevent any leads from falling through the cracks.
Follow-up reminders can be automatically set when you interact with a client, quickly snoozed for days, weeks, or months, and will give you contextual alerts that can be easily acted upon.
Client Follow Ups
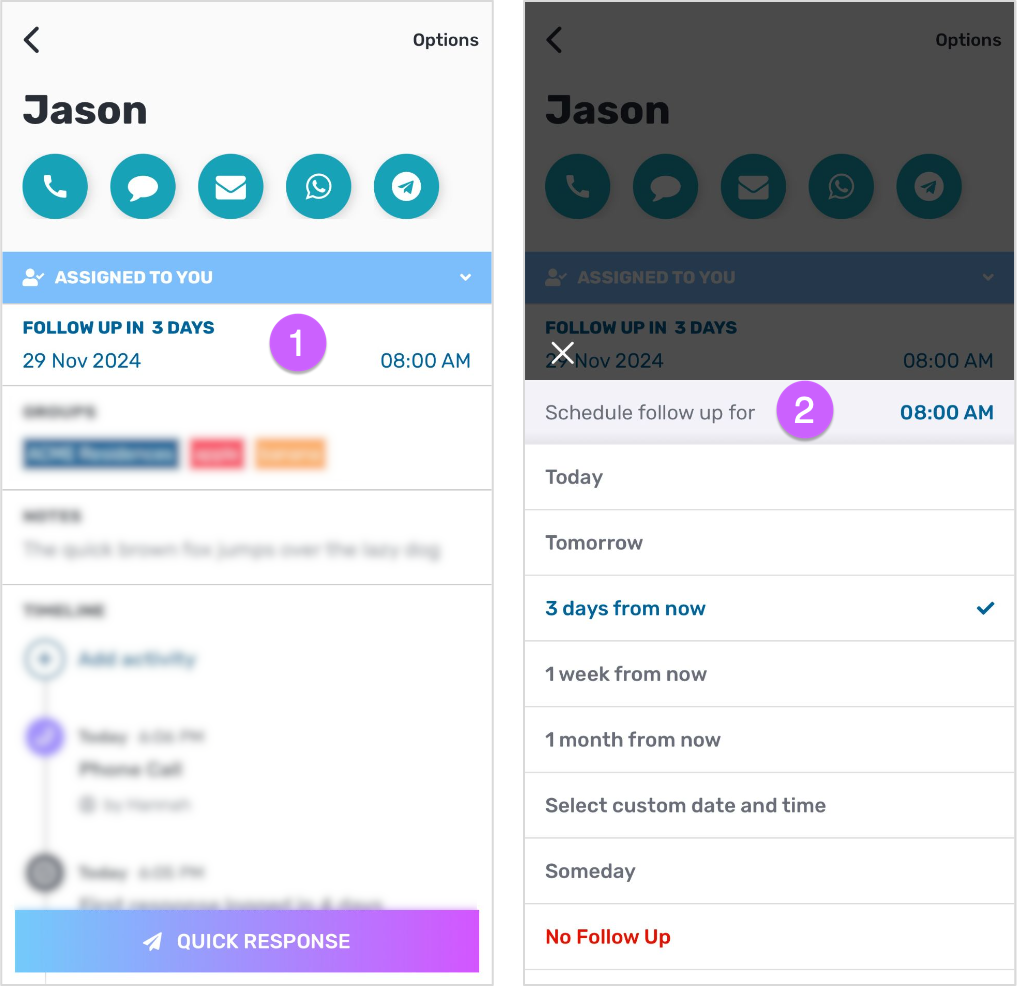
Every client in Privyr has a follow-up reminder, which is displayed in the Follow Up section when viewing the client. You can set or change the client’s follow-up by tapping on the Follow Up section and selecting a new date and/or time.
On top of scheduling the follow-up for a day, week, or month later, you can also choose from the following options:
- Select custom date and time to specify an exact date and time to follow up.
- Someday if you want to be reminded of the client in the future, but don’t have any specific timeframe to get back in touch. The system decide when to remind you of the client.
- No Follow Up if you don’t want to get back in touch with them ever again. This is usually appropriate for lost or abandoned leads.
Follow Up Alerts
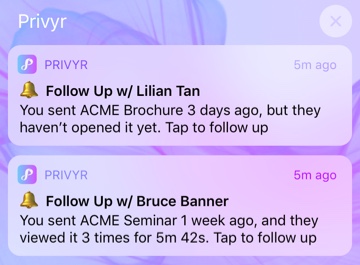
You’ll receive follow-up alerts via the Privyr app on the date and time that a client’s follow-up is due. These notifications include the client’s name, the last thing you sent them, and whether or not they interacted with it (for files and pages only).
Tap the alert to open the client details screen and view more information about them, such as their notes and timeline. From here, you can quickly contact them or send a quick response to keep your relationship warm and engaged.
Once done, you can snooze the follow-up so that you’ll be reminded to touch base with the client again in the future.
Actions Tab
The Actions tab allows you to efficiently engage and follow up with your leads by showing all the actions you need to do for your clients, including Follow Ups and Uncontacted Leads, in a single page. Simply tap on any lead to view their details and quickly perform the appropriate action.
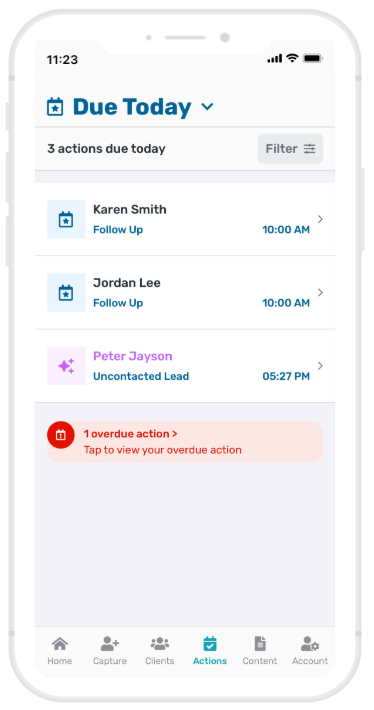
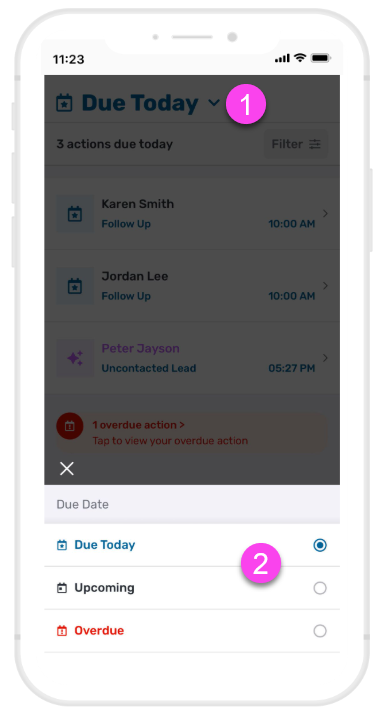
By default, you’ll see the actions that are Due Today, but you can easily change the Due Date to Upcoming or Overdue by tapping on the Due Today banner on the upper left-hand corner.
You can apply filters to narrow down or find specific activities based on Due Date, Assigned Team Member, and Type of Action (All Actions, Uncontacted Leads, Follow Ups).
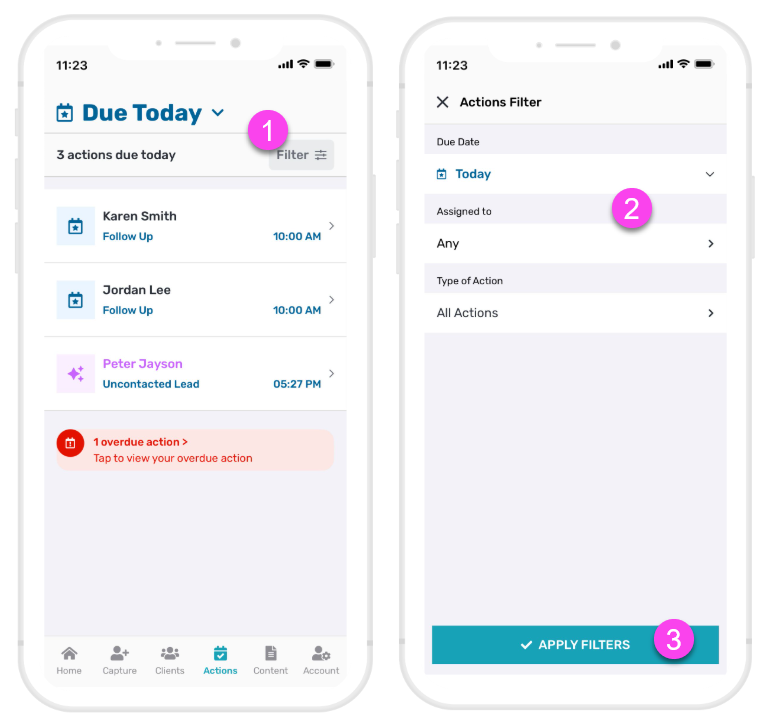
You will also see the number of clients with overdue actions at the bottom of the screen, allowing you to quickly identify which leads or clients need immediate attention because their follow ups or actions are already past due.
Follow Up Settings

Whenever you contact a client via one of the contact buttons on the Client Details Screen, or send them content (message/file/page), their follow-up date and time will be automatically updated based on your settings.
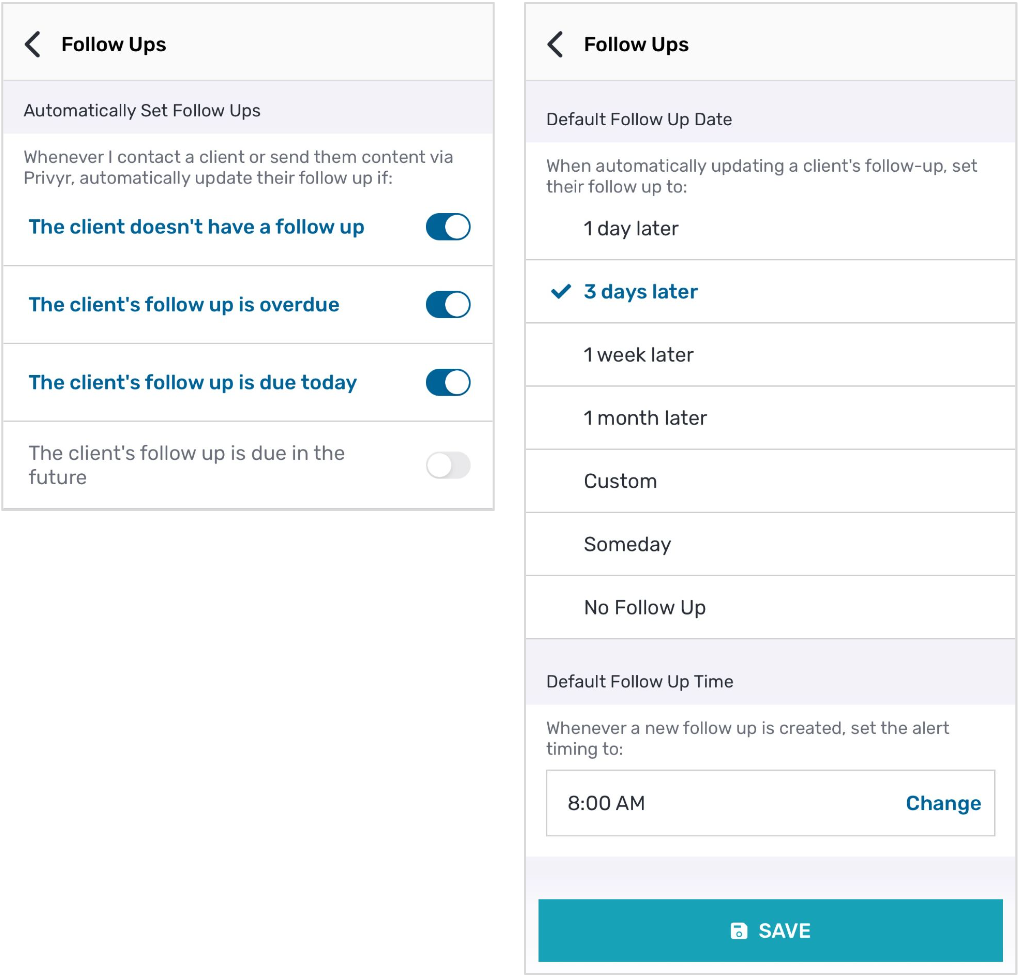
By default, if a client has no follow-up, or one that is currently due, their follow-up will be updated to 3 days later at 8:00 AM.
You can change this default setting by going to your Account > Settings > Follow Ups, then selecting the conditions to automatically set the follow-up, and the default follow-up date and time.
- Automatically Set Follow Ups: Specify the condition to update the follow-up
- Default Follow Up Date: Set how many days ahead the follow-up will be scheduled
- Default Follow Up Time: Choose the time of day for the follow-up alert
Updating Follow Ups After Contacting a Client
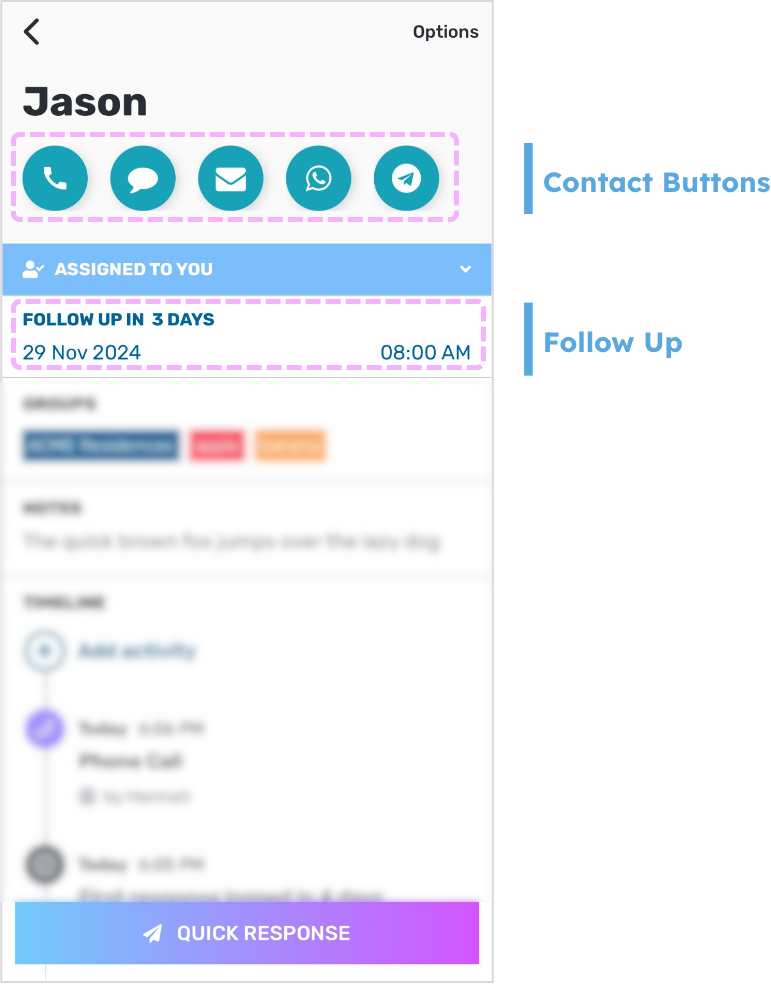
When you contact your client via one of the Contact Buttons on their Client Details Screen, their follow-up date and time will be automatically updated based on your Follow Up Settings.
You can quickly update the client’s follow-up by tapping on the Follow Up section and selecting a new date and/or time.
Updating Follow Ups After Sending Content
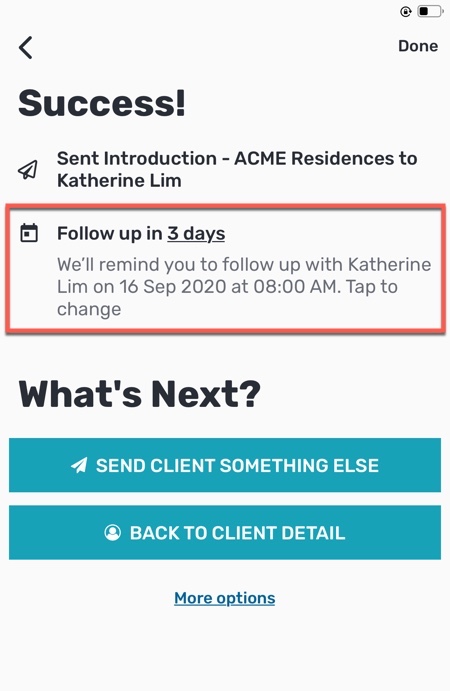
When you send content to a client through Privyr, their follow-up date and time will be displayed on the confirmation screen after sending. This follow-up date is automatically updated based on your Follow Up Settings.
You can quickly update the client’s follow-up from here by clicking on the follow-up section and selecting a new date and/or time.
Bulk Updating Follow Ups

You can view and update the Follow Ups of multiple clients at a time via the Bulk Actions feature on your Client List.
Just tap and hold on a client to trigger multi-select mode, then select the Calendar Icon in the footer to view the follow-ups of the selected clients.
You can individually update the follow-up of each client by clicking the Change button next to their name, or use the Set All option to update all at once.