Introduction
You can import clients to Privyr and export your Privyr client list to CSV, giving you full flexibility to transfer and manage your data wherever you need it. You can export clients and activities by date range, group, team member assigned, and more.
Importing Clients to Privyr
If you only have a few clients to add, you can manually create or import them from phonebook via the (+) icon on your Client List. You can also connect your Privyr account to lead sources such as Facebook Lead Ads, Google Ads Lead Forms, Website Contact Forms, and Zapier via our integrations to automatically add new leads from those sources to your Privyr account.
IMPORTING CLIENTS FROM CSV
If you have many contacts to add, you can bulk import them from a CSV file into your Privyr account. You’ll have options to add all imported contacts to a custom group, and can choose to skip or keep duplicate contacts that already exist in your account.
You can bulk import contacts via the following steps:
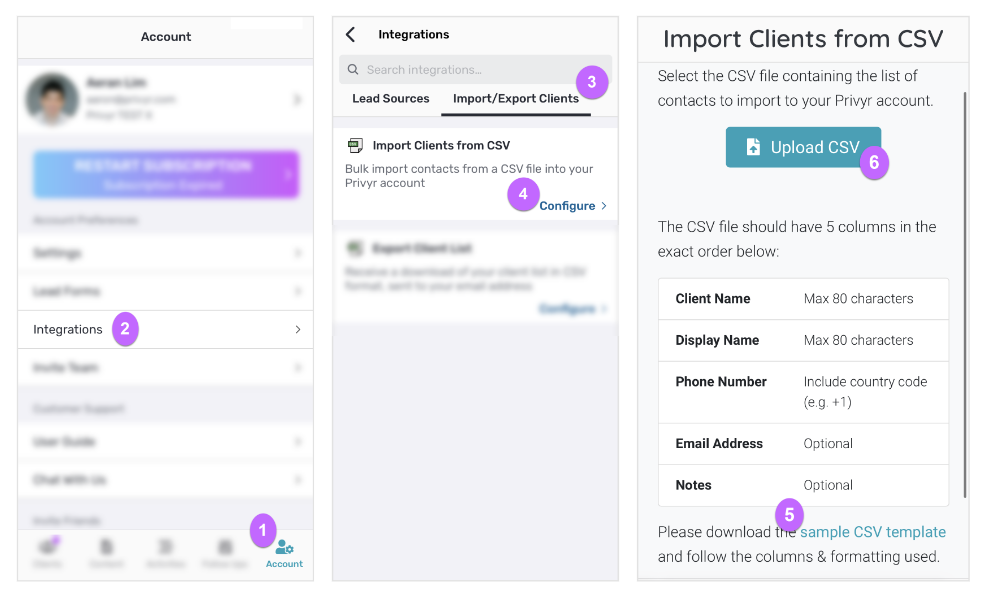
- In your Privyr app or desktop site, go to your Account tab > Integrations > Import/Export Clients tab
- Tap on Import Clients from CSV
- Here’s a direct link: www.privyr.com/integrations/import-clients-from-csv
- Download the sample CSV template and follow the columns and formatting to enter your contacts. Please note that there is a limit of 5,000 contacts per upload.
- For more details on each of the fields and how they are used, check out our guide on entering a new contact
- Upload your CSV, XLS, or XLSX file, then map the columns from your spreadsheet to the corresponding Privyr client field. Click on Continue to preview your data.
- For more details on each of the fields and how they are used, check out our guide on entering a new contact
- You can also download the sample CSV template and follow the columns and formatting. The columns in the sample sheet map exactly to Privyr’s client fields.
- Please note that there is a limit of 5,000 contacts per upload.
- Click on Continue to set your import preferences, and import your contacts:
- Date Added: This affects where they appear when sorting your client lists by ‘Date Added’. You may click on Set it to now to set the date added to the actual time you’re importing the CSV
- Assign to Team Member: All imported contacts can be assigned to the selected team member, left unassigned, or distributed according to your existing lead assignment rules.
- Add to Custom Group: All imported contacts will be automatically added to the selected group. Please ensure that the group already exists before uploading.
- Mark as Uncontacted: Choose whether to mark all imported contacts as ‘Uncontacted’ or not
- Skip Duplicated Contacts: You can choose to skip importing duplicate contacts (whose phone number or email address matches existing clients in your Privyr account) or continue to import duplicates.
- Once done, click on Import. You’ll be able to immediately view and access the imported contacts on your client list.
- If there were any contacts that were not imported due to formatting, deduplication, or other issues, you’ll be prompted to download the list of skipped contacts which will include the reason for skipping in the last column.
Exporting your Client List
You can export your client list and activities from Privyr to CSV format to view and edit the data in spreadsheet applications like Excel or Google Sheets.
You’ll have options to export all clients and activities, or just those that match criteria such as by date range, group, or team member assigned. The data will be sent to the registered email address on your Privyr account, with the option to add additional email recipients.
To export your Privyr client list and activities to CSV:
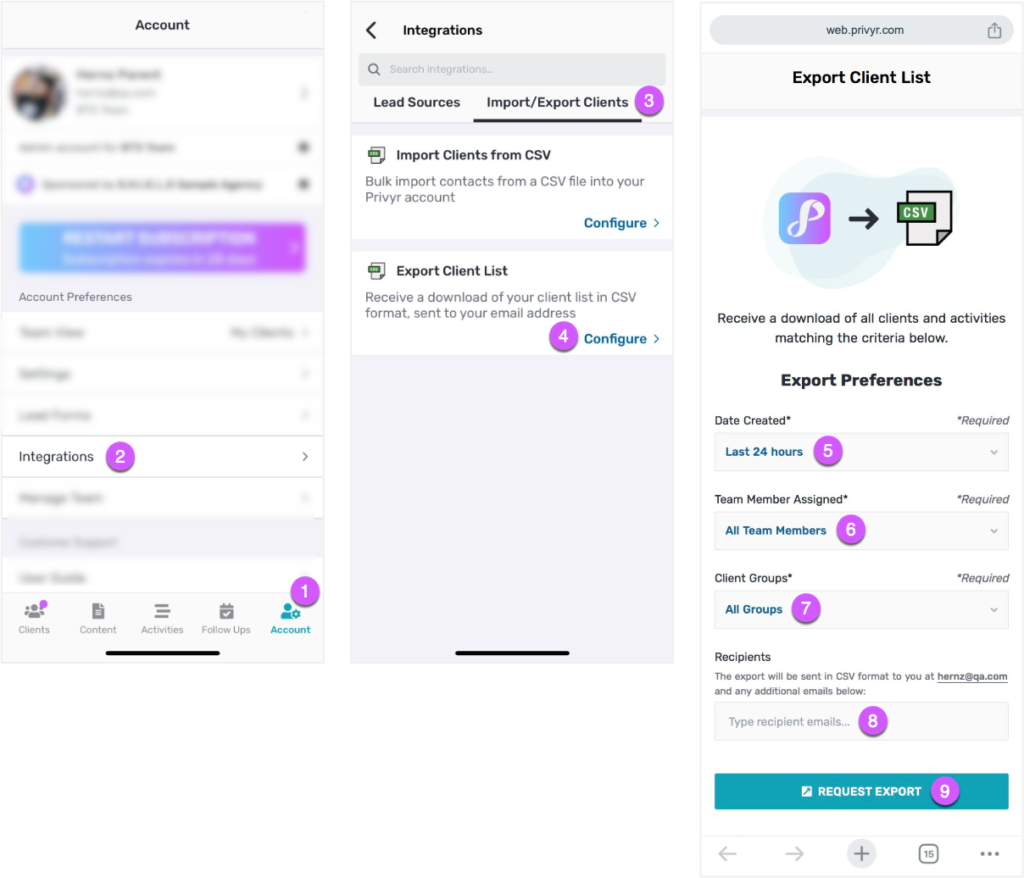
- Go to your Account tab
- Tap on Integrations
- Tap on Import/Export Clients
- Tap on Export Client List
- Here’s a direct link: web.privyr.com/integration/client-export
- Date Created:
Select clients added within your selected time frame:- Last 24 hours
- Last 7 days
- Last 30 days
- All Time
- Custom Date Range
- Since Last Export
- Team Member Assigned (only applicable for team accounts):
Select the team member(s) that the clients are assigned to:- All Team Members
- Unassigned
- Clients assigned to selected team member only
- Client Groups:
Select clients in a specific group- All Groups
- Clients in selected group only
- Recipients:
The client list will be sent to your registered email address by default, as well as any additional email addresses specified in this field. - Tap on Request Export
The data will be sent as a CSV file to the registered email address on your Privyr account, from [email protected] (please make sure that you’re not blocking emails from this address).