Introduction
You can connect Privyr to other lead sources or platforms via Zapier to receive new leads in your Privyr account. This gives you instant new lead alerts and automatically creates the leads in your client list so you can immediately contact them.
The Privyr Integration in Zapier lets you connect over a thousand different lead sources to Privyr, including ClickFunnels, Google Forms, Jotform, Calendly, Instamojo, LeadPages, GetResponse, and many other platforms.
Zapier Pricing
Privyr subscriptions include unlimited lead source integrations, lead notifications, and client management, so connecting to Zapier does not cost anything extra from your Privyr account.
However, connecting your lead source(s) via Zapier may require a paid Zapier subscription depending on the type and number of apps you wish to connect, and the volume of leads you receive.
Refer to Zapier’s pricing page for more information.
Setting Up Zapier
Automated connections on Zapier, also known as Zaps, can be set up directly from your Zapier account in just a few minutes. Each Zap has a Trigger and an Action.
To connect your lead source(s) to Privyr via Zapier, create a Zap with the lead source as the Trigger, and Privyr as the Action.
- Log in to your Zapier account, and click on Make a Zap
- Configure your lead source as the Trigger (When this happens…)
- The Trigger Event should be related to receiving a new lead, new contact, new form submissions, or similar
- Configure Privyr as the Action (Do this…)
- Choose App & Event: Select Privyr and Create Client
- Choose Account: Sign in to Privyr and enter your Privyr Account Token, which can be found on the Zapier integration page in your Privyr Account.
- Customize Client: Map the data from your lead source to the fields of a client in Privyr, such as the Client Name, Phone Number, Email Address, and Additional Client Details.
- Once done, you can test your Zap and activate it. That’s it!
For a detailed walkthrough of configuring Privyr as the action, connecting your account, customizing your client, and testing your Zap, view Setting up Privyr as a Zapier Action.
Please refer to the following walkthroughs for detailed instructions on configuring various platforms as the Trigger of a Zap:
Connecting to GetResponse
- Log in to your Zapier account, and click on Make a Zap
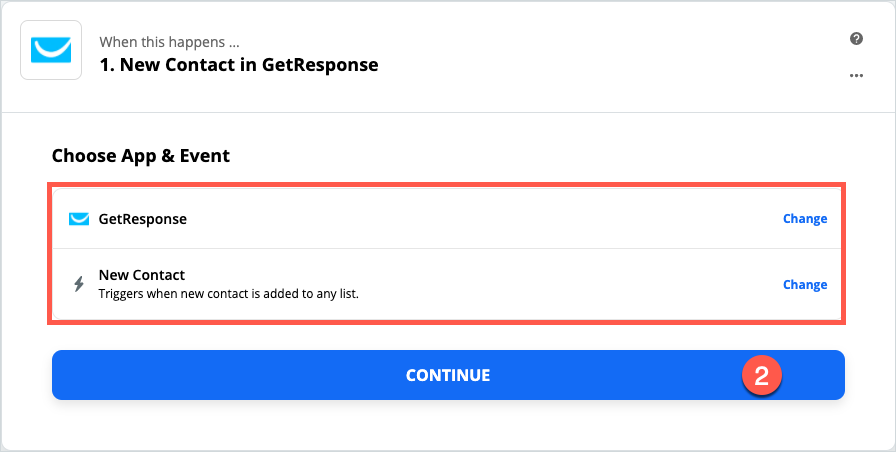
- Choose App & Event (Trigger):
- Choose App: Select GetResponse
- Choose Trigger Event: Select New Contact
- Click on Continue
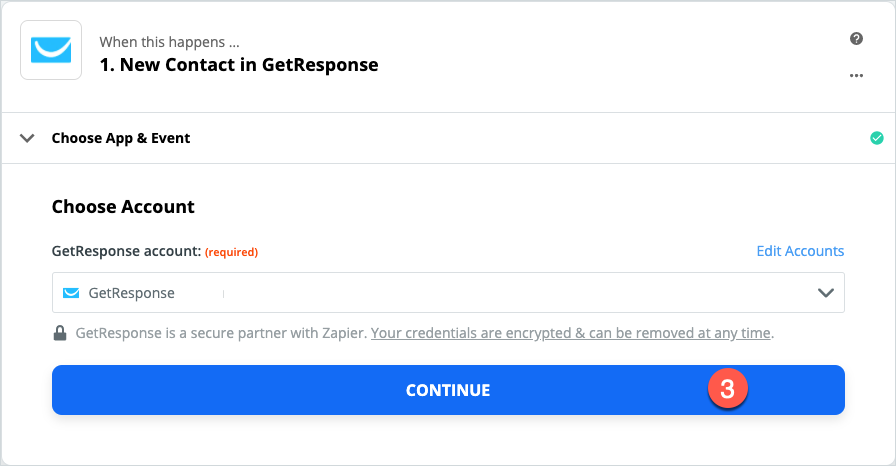
- Choose Account:
- Click on Sign in to GetResponse
- Enter your GetResponse API Key and click Yes, Continue
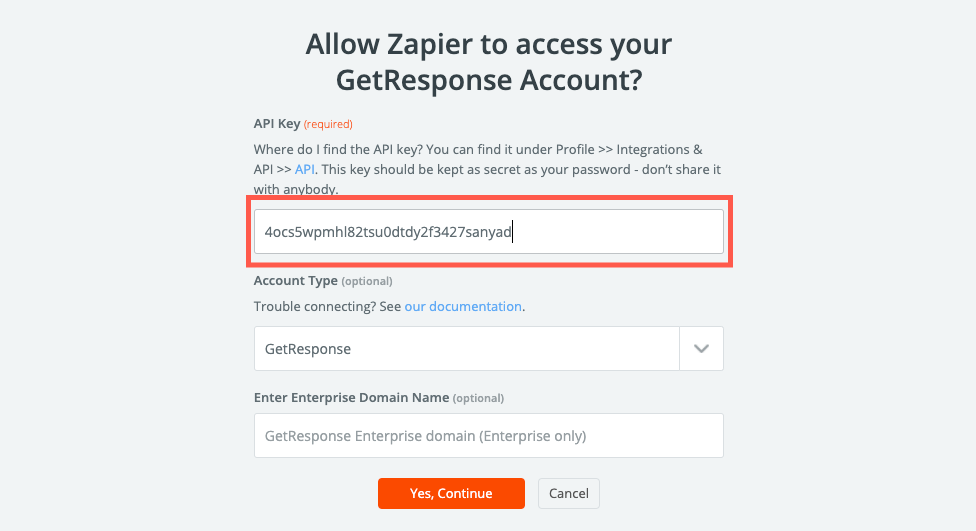
- Click Continue
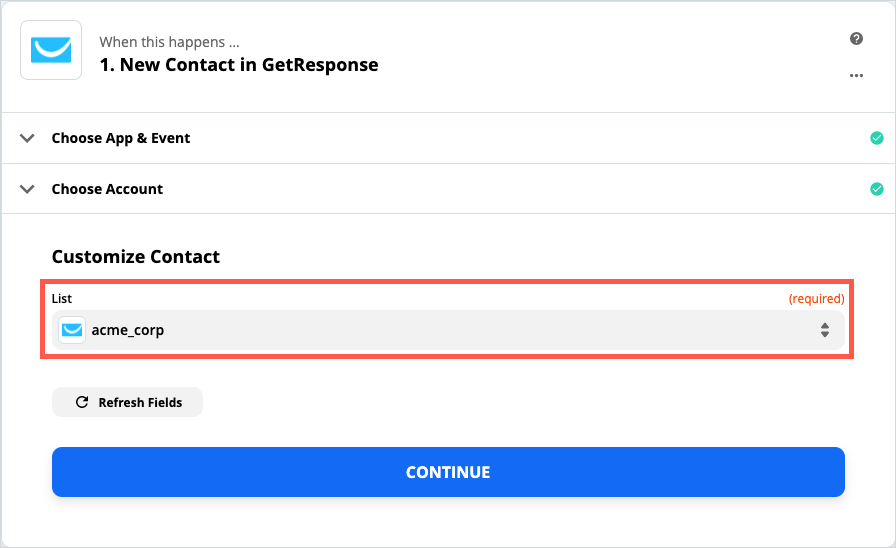
- Customise Contact:
- List: Select the name of your GetResponse lead list
- Click on Continue
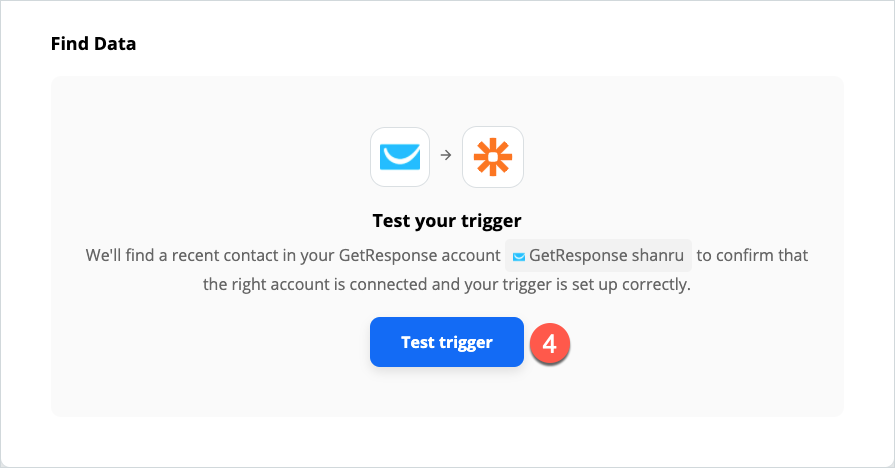
- Click on Test Trigger to pull a sample data
- Click on Continue
- Configure Privyr as the Action (Do this…)
- Choose App & Event: Select Privyr and Create Client
- Choose Account: Sign in to Privyr and enter your Privyr Account Token, which can be found on the Zapier integration page in your Privyr Account.
- Customize Client: Map the data from your lead source to the fields of a client in Privyr, such as the Client Name, Phone Number, Email Address, and Additional Client Details.
- Once done, you can test your Zap and activate it. That’s it!
For a detailed walkthrough of configuring Privyr as the action, connecting your account, customizing your client, and testing your Zap, view Setting up Privyr as a Zapier Action.
Connecting to Other Systems
You can connect any lead source or platform that supports Zapier to your Privyr account by creating a Zap with the lead source as the Trigger, and Privyr as the Action.
- Log in to your Zapier account, and click on Make a Zap
- Configure your lead source as the Trigger (When this happens…)
- The Trigger Event should be related to receiving a new lead, new contact, new form submissions, or similar
- Configure Privyr as the Action (Do this…)
- Choose App & Event: Select Privyr and Create Client
- Choose Account: Sign in to Privyr and enter your Privyr Account Token, which can be found on the Zapier integration page in your Privyr Account.
- Customize Client: Map the data from your lead source to the fields of a client in Privyr, such as the Client Name, Phone Number, Email Address, and Additional Client Details.
- Once done, you can test your Zap and activate it. That’s it!
For a detailed walkthrough of configuring Privyr as the action, connecting your account, customizing your client, and testing your Zap, view Setting up Privyr as a Zapier Action.
Setting up Privyr as a Zapier Action
Once you’ve created a Zap with your lead source as the Trigger (When this happens…), you can configure Privyr as the Action via the following steps.
1. Set Privyr as the the Action (Do this…)
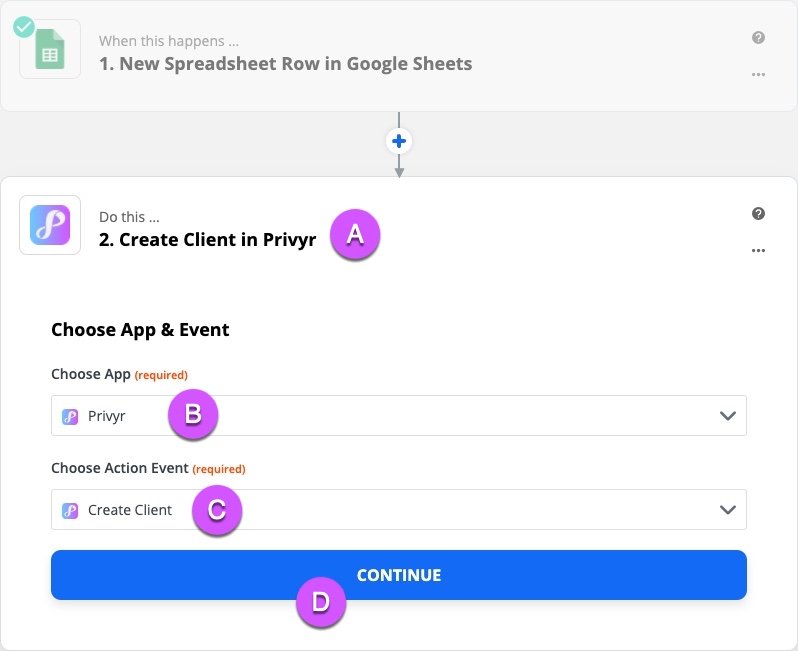
- A) Click on the Action (Do this…) and Choose App & Event
- B) Choose App: Select Privyr
- C) Choose Action Event: Select Create Client
- D) Click on CONTINUE
2. Connect your Privyr account

- E) Under Choose Account, click on Sign in to Privyr
- F) Go to the Zapier integration page in Privyr and copy your Privyr Account Token
- G) Paste your Privyr Account Token into the Zapier access prompt
- H) Click on Yes, Continue
- I) Click on CONTINUE
3. Customize Client to map the data from your Lead Source to the fields of a Client in Privyr
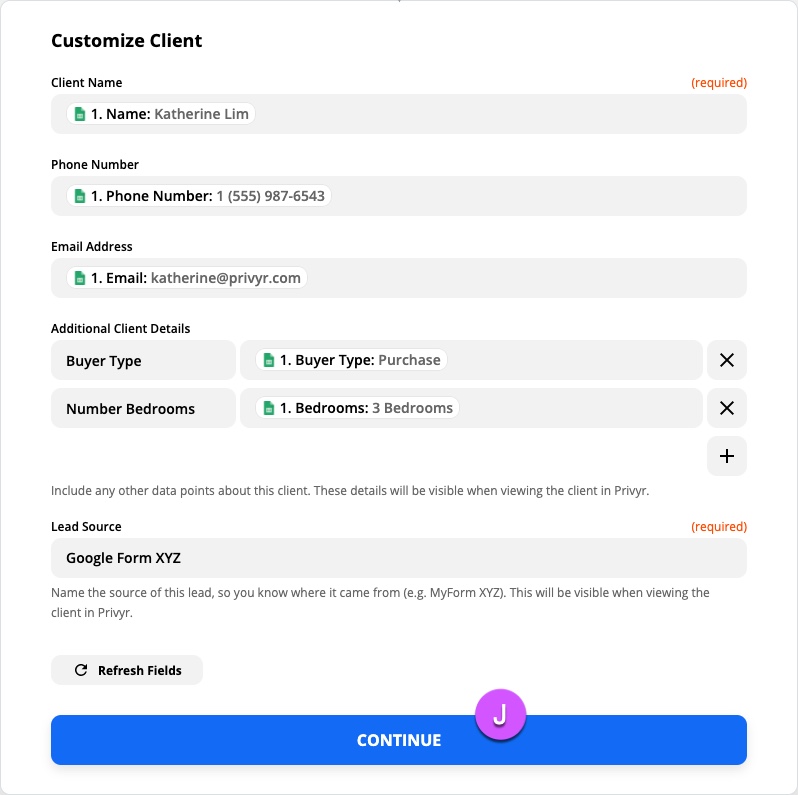
- Client Name: The name of the lead (required)
- Phone Number: The phone number of the lead (optional)
- Email Address: The email address of the lead (optional)
- Additional Client Details: Add any other data points that you’d like to save for a lead, such as your custom questions and answers. This information will be displayed when viewing the lead in Privyr.
- Lead Source: Name the source of the lead, so you know where it came from. This will be visible on your new lead alerts, as well as when viewing the lead in Privyr.
- J) Once done, click on CONTINUE
4. Test and Activate your Zap
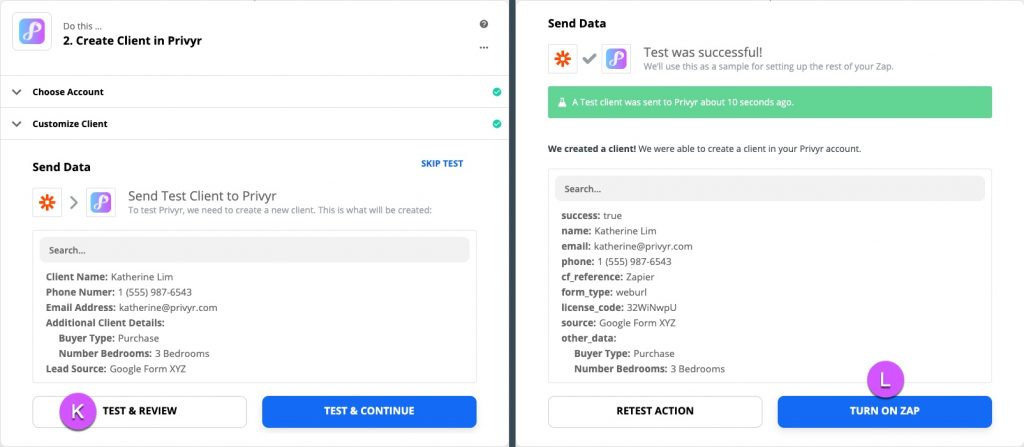
- K) Click on TEST & REVIEW. You should receive a test lead in your Privyr account with the data mapped correctly.
- L) Once done, click on TURN ON ZAP to activate it. You’ll all set!
New Lead Alerts

Once you connect your lead source(s) to Privyr through Zapier, any new leads submitted via those platforms will send you a new lead alert via the Privyr app and email. You can configure these alerts via your Account Notification Settings.
Tap the alert to view the lead with all the captured information displayed on their notes field. You can immediately contact them or send an auto-personalised Quick Response.
You can also enable additional alerts if you haven’t acted on a new lead within 15 minutes and 60 minutes, in case you missed the first notification. You can enable these extra alerts via your Account Notification Settings.
All new leads from Zapier will be displayed with an UNCONTACTED label in their client details and the client list until you act on them. They’ll also appear in your Uncontacted Leads group and Actions tab.
Depending on your Uncontacted Leads Settings, the UNCONTACTED label may be automatically removed when you view the lead, click their contact buttons, send them content, and/or set a follow up date. You can also manually mark or unmark a lead as UNCONTACTED via the options menu when viewing the lead.
WhatsApp Auto-Responder
You can set up a WhatsApp Auto-Responder to instantly message new leads on WhatsApp. Any new lead you receive via your integrations will be immediately and automatically messaged from your own WhatsApp number, even when you’re busy or offline.
All messages are sent from your existing WhatsApp Business number, so you can view and continue all conversations directly in the WhatsApp Business app on your phone or laptop.
Privyr’s Auto-Responder works through WhatsApp’s official APIs (Privyr is a verified Meta Business Partner), keeping your WhatsApp account and data safe while complying with WhatsApp’s Terms and Conditions.
For more information on setting this up, view our full guide on WhatsApp Auto-Responder.
Distribute Zapier Leads to other Recipients
You can automatically share leads from Zapier with other recipients via email, even if they don’t have a Privyr account. This is useful if you’d like to distribute leads to your clients or colleagues, and can be configured to forward all leads to all recipients, or distribute leads equally in a Round Robin fashion.
Recipients will receive new lead details instantly via email and/or the Privyr app, with attribution ‘This lead was sent to you by @name at @company’ (where @name and @company are replaced with the Name and Company from your User Profile, respectively).
Find out more about Automatic Lead Distribution.