Introduction
You can connect Privyr to your WordPress website to receive new leads submitted via Contact Form 7 in your Privyr account. This gives you instant new lead alerts and automatically creates the leads in your client list so you can immediately contact them.
Note that you’ll need to have admin access to a website built on WordPress, with the Contact Form 7 plugin already installed.
New Lead Alerts

Once you connect Contact Form 7 to your Privyr account, any new leads submitted via your contact forms will send you a new lead alert via the Privyr app and email. You can configure these alerts via your Account Notification Settings.
Tap the alert to view the lead with all the captured information displayed on their notes field. You can immediately contact them or send an auto-personalised Quick Response.
You can also enable additional alerts if you haven’t acted on a new lead within 15 minutes and 60 minutes, in case you missed the first notification. You can enable these extra alerts via your Account Notification Settings.
All new leads from Contact Form 7 will be displayed with an UNCONTACTED label in their client details and the client list until you act on them. They’ll also appear in your Uncontacted Leads group.
Depending on your Uncontacted Leads Settings, the UNCONTACTED label may be automatically removed when you view the lead, click their contact buttons, send them content, and/or set a follow up date. You can also manually mark or unmark a lead as UNCONTACTED via the options menu when viewing the lead.
Connecting to Contact Form 7
It only takes a minute to connect Contact Form 7 to your Privyr account, via the steps below:
- Log into your WordPress Admin site
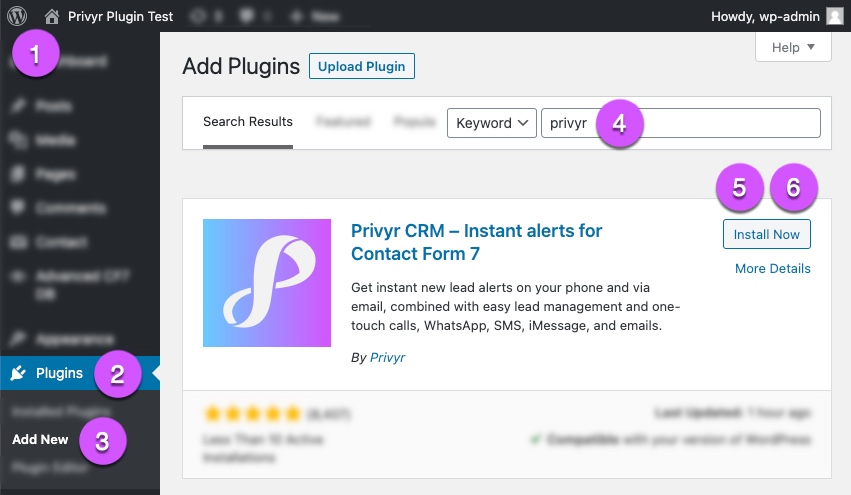
- Click on Plugins in the left admin panel
- Click on Add New in the left admin panel
- Search for “privyr” to find the Privyr CRM plugin
- Click on Install Now and wait a few seconds
- Click on Activate once installation is complete
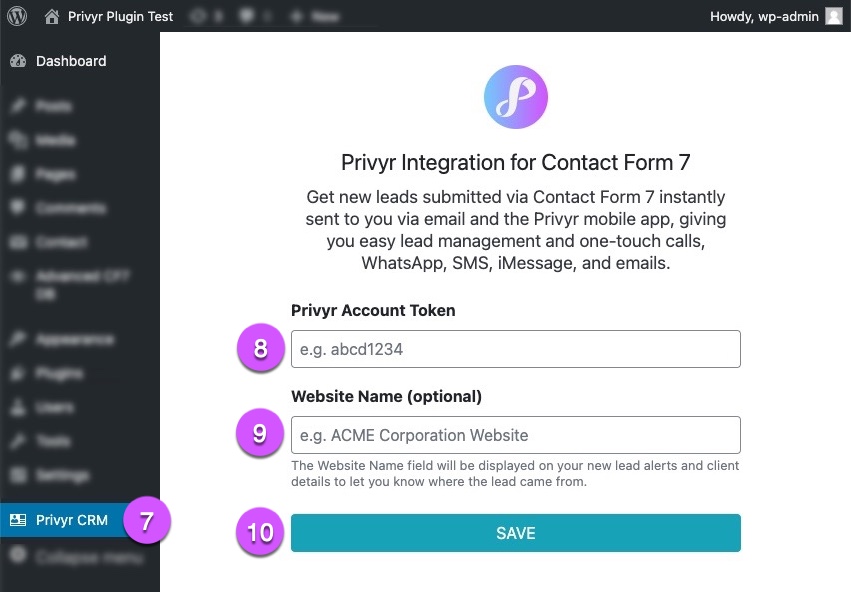
- Click on Privyr CRM at the bottom of the left admin panel
- Enter your Privyr Account Token
- You can find your Privyr Account Token under your Integrations > WordPress Contact Form 7 Instructions (step 8).
- Enter a Website Name (optional)
- This will be displayed on your new lead alerts and client details to let you know where the lead came from.
- Click on ‘SAVE’
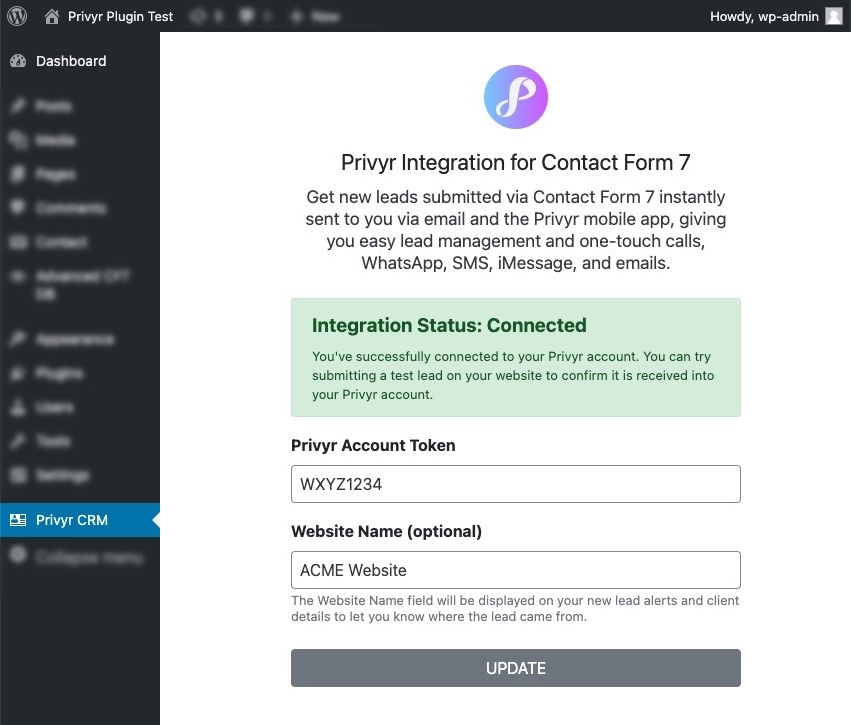
Once done, you’ll see a confirmation screen indicating that the Integration Status is Connected. You can then submit test leads on your website contact form(s) to ensure you receive them instantly in your Privyr account.
Distribute Contact Form 7 Leads to other Recipients
You can automatically share leads from Contact Form 7 with other recipients via email, even if they don’t have a Privyr account. This is useful if you’d like to distribute leads to your clients or colleagues, and can be configured to forward all leads to all recipients, or distribute leads equally in a Round Robin fashion.
Recipients will receive new lead details instantly via email and/or the Privyr app, with attribution ‘This lead was sent to you by @name at @company’ (where @name and @company are replaced with the Name and Company from your User Profile, respectively).
Find out more about Automatic Lead Distribution.