Introduction
Privyr for Agencies is a dashboard for marketing agencies to easily manage, monitor, and collaborate on their clients’ Privyr accounts, leads, and sales processes.
Agency accounts can extend invitations to both existing Privyr users and those who are new to Privyr. Once a Privyr user accepts the invitation to manage their account, the agency will be able to view their full Client List and all Client Details directly from the agency dashboard.
This feature allows agencies to:
- Manage and monitor multiple clients’ Privyr accounts at once
- Keep track of new leads, response times, and lead status across all Privyr accounts
- Gain deeper insights into client interactions, including which leads and campaigns are doing well, and which aren’t
- Provide valuable suggestions to optimize each client’s sales and lead management process
Creating and Accessing Your Agency Account
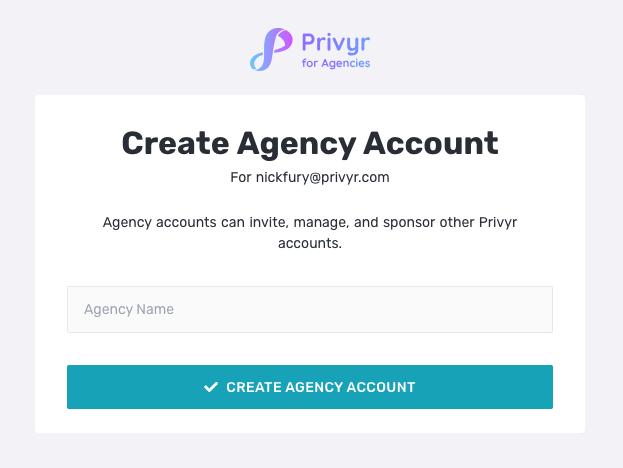
If you already have a Privyr account (or once you’ve created a free account), you can create an Agency account via the following steps:
- Go to the Privyr for Agencies portal on a laptop, desktop, or tablet device
- If you’re not already logged into Privyr, you’ll be prompted to log into your main Privyr account
- Enter an agency name and click CREATE AGENCY ACCOUNT
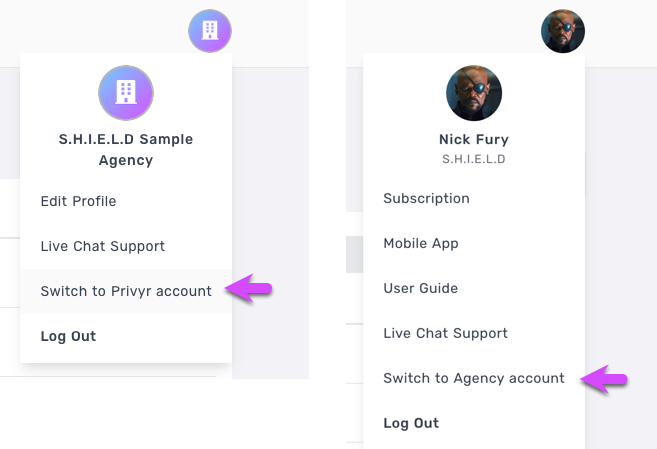
Upon creating your Agency Account, you will be able to switch between your Privyr account and Agency account via your profile dropdown settings.
Note that only existing Privyr users can create an Agency Account. If you don’t have a Privyr account yet, please sign up for a free account here.
Inviting Clients to be Managed by Your Agency
You can invite your clients, whether they already have a Privyr account or not, to be managed by your agency via the following steps:
- Access your Agency Dashboard
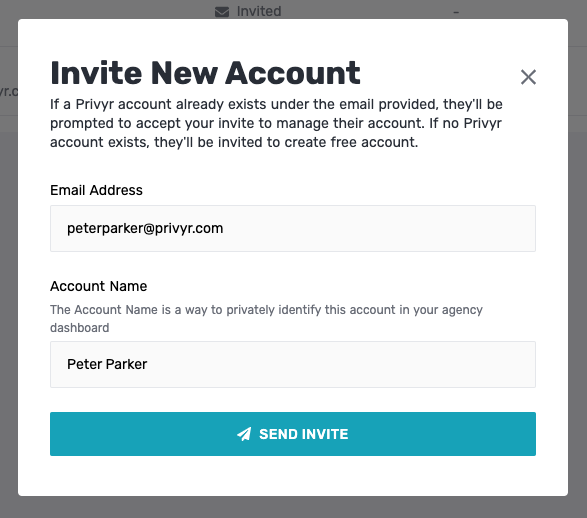
- Click + INVITE ACCOUNT

- Enter the Email Address and Account Name of the client to invite
- Click on SEND INVITE to send the invitation via email
Once invited, recipients will receive an email to accept your invitation. If they don’t have a Privyr account, they’ll be prompted to create one before accepting your invite.
You can view the status of your invitations on your Agency Dashboard.
Note that if you invite a team account and they accept the invitation, all leads from the entire team will be visible to you. However, the invite must be sent to the admin of the team, as only the admin has permission to grant access to your agency.
Account Statuses
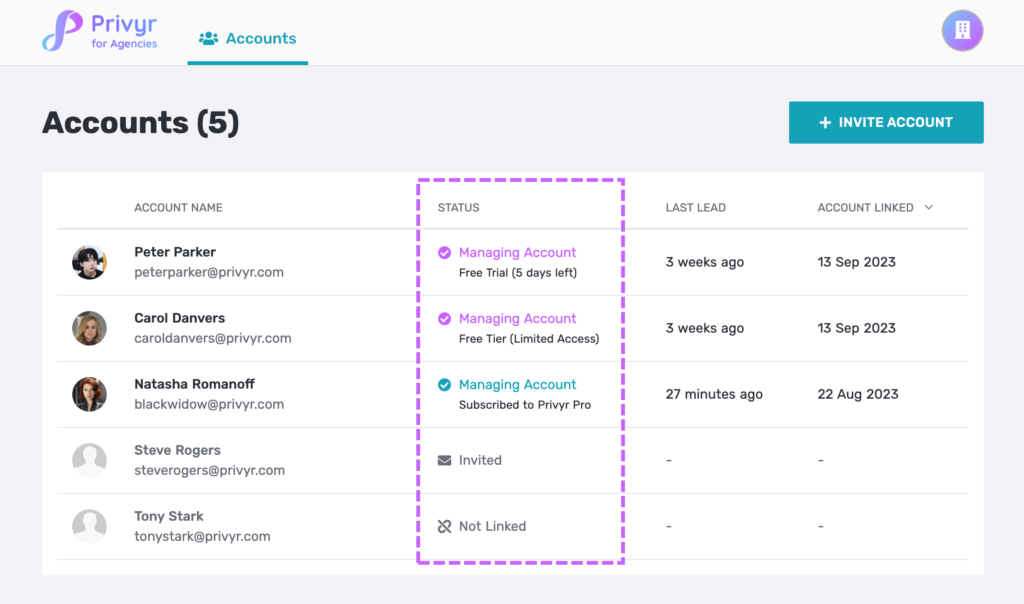
Once you’ve invited clients to be managed by your agency, you’ll be able to see the status on your Agency Dashboard. There are three main statuses:
- INVITED: You’ve sent the invitation email, but the recipient has not accepted it yet. You can click on the account for options to Cancel Invite or Resend Invite.
- NOT LINKED: The account was previously managed by your agency, but has since removed access or had their invitation cancelled. You can click on the account for options to Remove Account or Resend Invite.
- MANAGING ACCOUNT: The account has accepted your invitation, and you’re now actively managing the account. You can click the account to view the account’s details and client data.
- You’ll also see information on whether each Privyr account is currently subscribed to Privyr Pro, on the free trial, or on the free tier of Privyr
Viewing Account Details & Clients
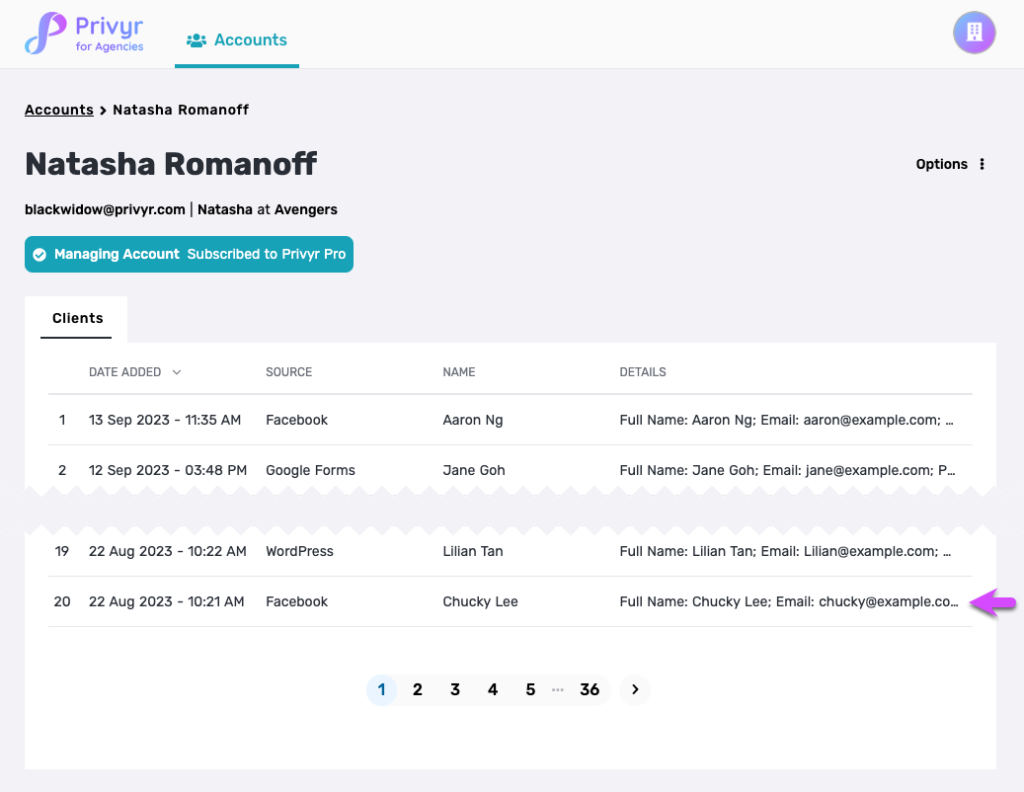
For all accounts with the status ‘Managing Account’, you can click on the account to view the Privyr Account details and a list of all clients under it.
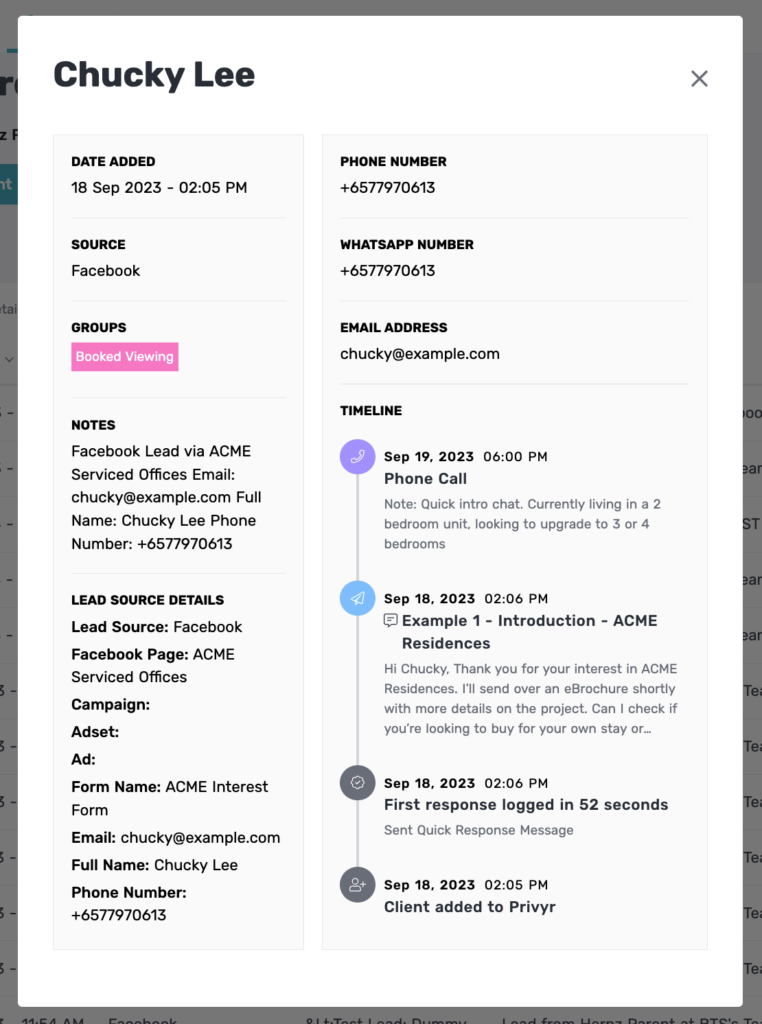
You can click on an individual client to view their full Client Details, including the client’s status, first response time, and a timeline of all interactions.
Unlinking Accounts from an Agency
STEPS TO UNLINK ACCOUNT FROM THE AGENCY DASHBOARD
From your Agency Dashboard, you can unlink a Privyr account to stop managing their account and data, via the following steps:
- When viewing an Account, click on Options
- Select Unlink account
- Select UNLINK ACCOUNT to confirm
Once you unlink an account from your agency, you’ll no longer be able to view or manage any data or settings in their account.

STEPS TO UNLINK ACCOUNT FROM A PRIVYR ACCOUNT
If a client’s Privyr account is managed by your agency, they have the ability to revoke access and unlink from your agency at any time, via the following steps:
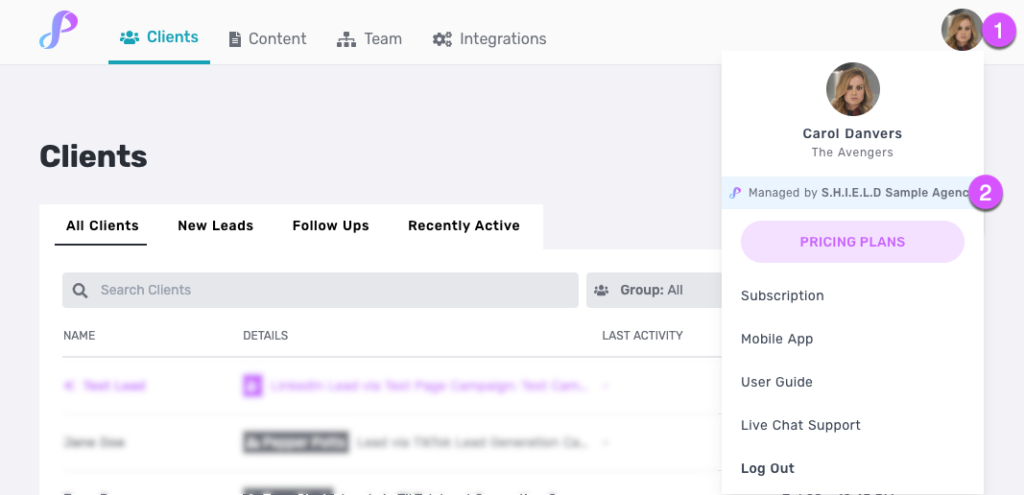
- On the web version of Privyr, click on your Profile Photo in the header to show the dropdown options
- On the Privyr mobile app, go to your Account tab
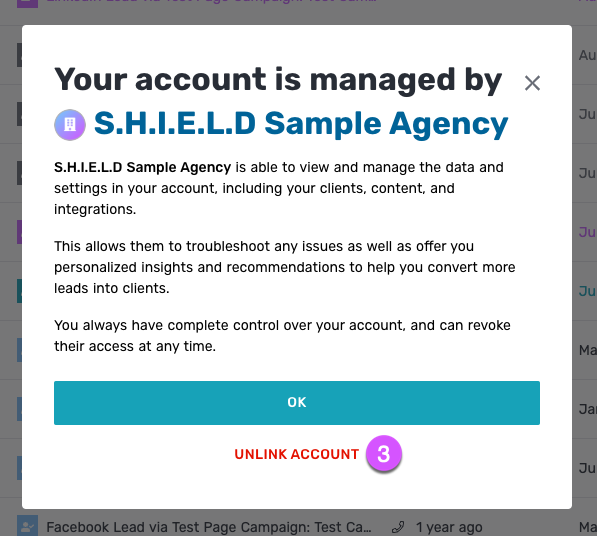
- Click on ‘Managed by AGENCY_NAME’
- Select UNLINK ACCOUNT
Once a Privyr account revokes your access, you’ll no longer be able to view or manage any data or settings in their account.
Accepting an Agency’s Invitation
When you invite someone to be managed by your agency, they’ll receive an email with instructions to accept the invite and grant you permission to the data in their Privyr account.
For existing Privyr users to accept an invitation:
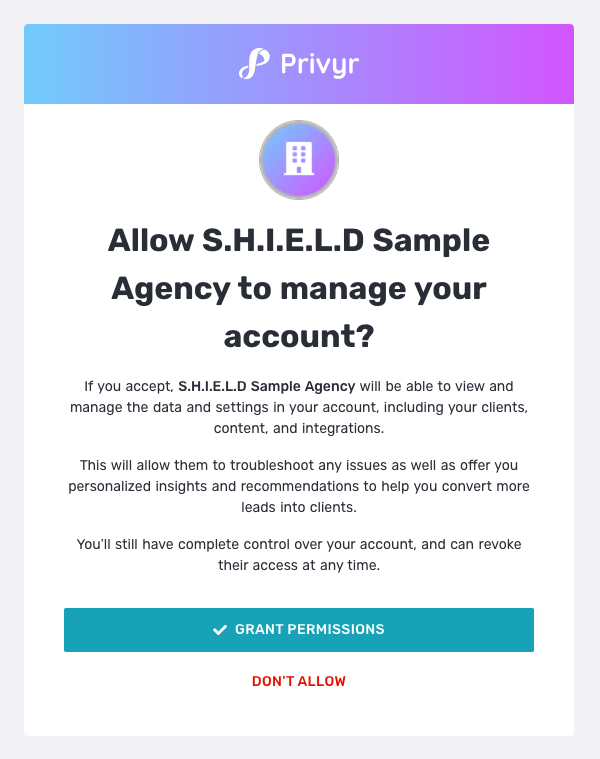
- In your email inbox, open the invitation email titled ‘Allow AGENCY_NAME to manage your account?’
- Click on VIEW INVITE IN PRIVYR
- You may be prompted to log into your Privyr account, if you aren’t already logged in
- Select GRANT PERMISSIONS
For those without a Privyr account:
- In your email inbox, open the invitation email titled ‘Allow AGENCY_NAME to manage your account?’
- Click on CREATE PRIVYR ACCOUNT
- The invitation will be displayed upon completing the account creation
- Select GRANT PERMISSIONS
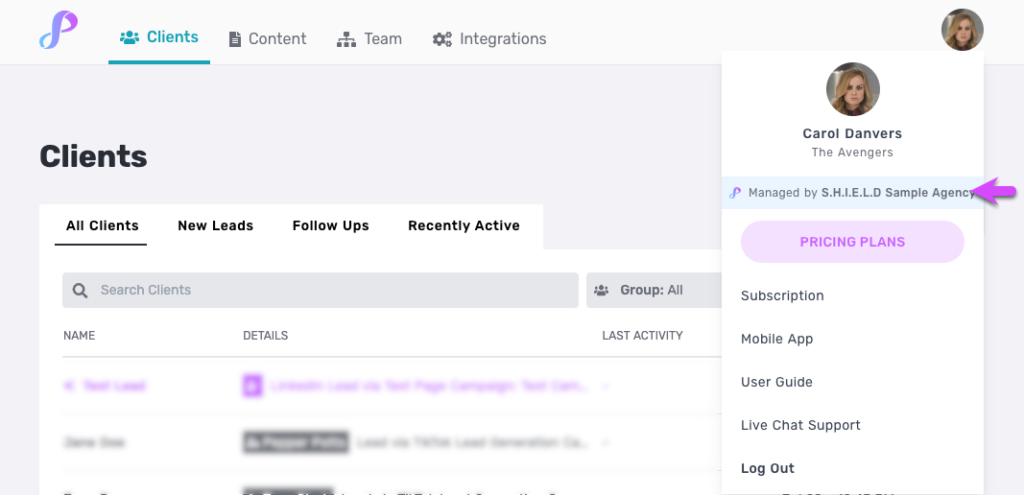
Upon successfully accepting the agency invitation, your Privyr account will display an indicator to show that it is under agency management, on both the web and mobile versions of Privyr.